SolarEdge Solar Inverters & Power Optimisers Error messages
SolarEdge inverters come standard with 12 year warranties, this is far longer than a standard solar inverter warranty of 5 years.
SolarEdge power optimisers come standard with a 25 year warranty, that is the same length as the performance warranty on the solar panels they are connected too.
 The Limited warranty for SolarEdge solar power inverters and the solar panel optimisers does not cover labour costs of a third party to travel to your property and replace or repair the units, however Gold Coast Solar Power Solutions are a SolarEdge Certified Installer and as a certified installer SolarEdge will cover our labour costs for any warranty work.
View SolarEdge Limited Warranty Information
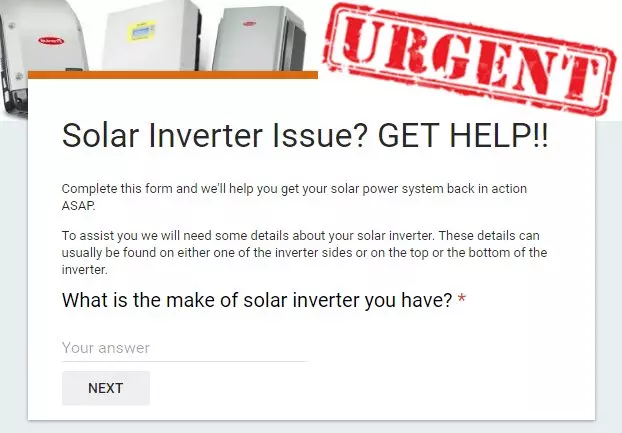
Below is a list of error messages, explanations on the error or fault and a list of actions to take to resolve the issue.
If you have one of the error or fault messages below we recommend you follow the listed actions to take to remove the fault before contacting a company who can help you further such as Gold Coast Solar Power Solutions.
SolarEdge Inverter Single Phase – Fault Codes and Error Messages
| Error Number for Single Phase Inverter |
LCD Message |
Cause and Troubleshooting | |
|---|---|---|---|
| CPU v3.18xx and before |
CPU v3.19xx and later |
||
| 4, 5, 8, 18- 23, 39, 42, 45, 48 |
2×13, 2×15, 2×16, 3×2, 2x2D, 3xF |
SW Error | Contact SolarEdge Support |
| 9, 13 | 2×9, 2xD | AC Current Surge Vac surge |
Ground current surge. 1. Check the AC connection to the inverter 2. Check with the grid operator if a large surge source or irregular load exists near the site. 3. If the grid does not have problems contact SolarEdge support. |
| 10, 37, 38 | 2xA, 2×25, 2×26 |
Ground Current – RCD |
Ground faults may occur due to insufficient insulation to the ground.Only a qualified technician should handle this problem, and only after taking proper precautions. 1. Turn the inverter ON/OFF switch to OFF. 2. Wait five minutes for the input capacitors to discharge. 3. Disconnect the AC breaker. 4. Disconnect the DC inputs. 5. Connect each DC string separately, turn the AC and the inverter ON/OFF switch to ON, until the error appears for the faulty string. 6. Do not connect strings with a grounding fault to the inverter. A certified installer must fix the faulty string before connecting it to the inverter 7. For further documentation, contact SolarEdge Support. |
| 14 | 2xE | AC Voltage Too High (Line 1/2/3) |
AC voltage surge. If the fault persists: 1. Check the AC connection to inverter. 2. Verify that the inverter is set to the correct country. 3. Check with the grid operator if a large surge source or irregular load exists near the site. 4. Verify that the output wire size matches the distance between the inverter and the location of the grid connection. 5. Use a larger gauge wire for the AC output. 6. Refer to the AC Wiring Application Note |
| 15 | 2xF | DC Voltage Too High (surge) |
The SolarEdge system normally eliminates DC overvoltage errors. If the fault persists: 1. Turn OFF the inverter ON/OFF switch. If after five minutes, the LCD panel does not show a low safety voltage (1V per optimizer), check which string is malfunctioning and recheck its connections to the inverter. 2. Proceed according to Power Optimizer Troubleshooting 3. Re-commission all inverters in the site, as described in Commissioning the Installation. |
| 16, 149, 153, 181 |
2×10, 2×95, 2×59, 2xB5 |
Hardware Error | Contact SolarEdge Support. |
| 17 | 2×11 | Temperature Too High |
Over temperature 1. Verify proper inverter clearances. 2. Make sure the heat-sink fins are clean and unobstructed. |
| 24 | 2×18 | Faulty Temp. Sensor |
Broken or unconnected temperature sensor. Contact SolarEdge Support. |
| 25 | 2×19 | Isolation Fault | PV solar array is not properly isolated from ground earth. 1. Check the PV installation for isolation problems and ground leakage. 2. Only a certified PV installer must fix the faulty string before connecting it to the inverter. 3. Refer to www.solaredge.com/files/pdfs/application_note_isolation_fault_troubleshooting.pdf |
| 26 | 2x1A | Faulty AC Relay | Contact SolarEdge support. |
| 28 | 2x1C | RCD Sensor Error | |
| 29, 30 | 2x1D, 2x1E | Phase Balance Error |
1. Check the grid connection. 2. Check the GND connection. 3. Check the L1, L2 and Neutral connections. 4. Verify symmetric load between L1, and L2 . 5. Consult the local grid authority. |
| 31, 33 | 2x1F, 2×21 | AC Voltage Too High (Line 1/2/3) |
Grid voltage is above the country limit. 1. Verify that the inverter is set to the correct country. 2. Turn OFF the inverters in the site and verify AC grid voltage. 3. If the inverter is located far from the connection point to the grid, use a larger gauge AC wire. 4. Consult the grid operator. 5. If permitted by local authorities, change the grid protection values. |
| 32, 41 | 2×20, 2×29 | AC Voltage Too Low |
1. Verify that the inverter is set to the correct country. 2. Consult the grid operator. 3. If permitted by local authorities, change the grid protection values. |
| 34 | 2×22 | AC Freq Too High (Line 1/2/3) |
|
| 35 | 2×23 | AC Freq Too Low (Line 1/2/3) |
|
| 36 | 2×24 | DC Injection (Line 1/2/3) |
Contact SolarEdge support. |
| 40 | 2×28 | Islanding | Grid is down. When AC grid voltage returns the inverter will restart after the reconnection time. If the problem persists, consult with the grid operator. |
| 44 | 2x2C | No Country Selected |
Select the country |
| 144 | 2×90 | Islanding – Passive | AC grid voltage malfunction. When AC voltage returns the inverter should restart after the reconnection time. If the problem persists, consult with the grid operator. |
| 145 | 2×91 | UDC Max | Contact SolarEdge support. |
| 146 | 2×92 | UDC Min | Contact SolarEdge support. |
| 147, 150, 151 |
3×11, 2×96, 2×97 |
Arc Fault Detected | Refer to http://www.solaredge.com/sites/default/files/arc_fault_detection_application_note.pdf |
| 152 | 2×98 | Arc detector selftest failed |
|
| 1-4, 6-7 | 8×66 – 8×69 8x6A – 8x6F |
Fan # Failure | Clean or replace the fan |
| 5 | Turn Switch Off to Configure | Appears when trying to access the Setup menus during production | |
SolarEdge Inverter – 3 Phase, Fault Codes and Error Messages
| Error Number for Three Phase Inverter |
LCD Message |
Cause and Troubleshooting | |
|---|---|---|---|
| CPU v3.18xx and before |
CPU v3.19xx and later |
||
| 45, 48, 50- 53, 94, 107- 111,113 |
3×2,3xF, 8×11 – 8×13, 8x3D, 8x4A – 8x4E, 8×50 |
SW Error | Contact SolarEdge Support |
| 112 | 8x4F | Wrong AC connection |
Switch between L1 and L2 or L2 and L3 connections |
| 76, 77, 90 | 8x2B, 8x2C, 8×39 |
Ground Current – RCD |
Ground faults may occur due to insufficient insulation to the ground.Only a qualified technician should handle this problem, and only after taking proper precautions. 1. Turn the inverter ON/OFF switch to OFF. 2. Wait five minutes for the input capacitors to discharge. 3. Disconnect the AC breaker. 4. Disconnect the DC inputs. 5. Connect each DC string separately, turn the AC and the inverter ON/OFF switch to ON, until the error appears for the faulty string. o Do not connect strings with a grounding fault to the inverter. A certified installer must fix the faulty string before connecting it to the inverter o For further documentation, contact SolarEdge Support. |
| 58/59/60 | 8×19/ 8x1A/ 8x1B |
AC Voltage Too High (Line 1/2/3) |
AC voltage surge. If the fault persists: 1. Check the AC connection to inverter. 2. Verify that the inverter is set to the correct country. 3. Check with the grid operator if a large surge source or irregular load exists near the site. 4. Verify that the output wire size matches the distance between the inverter and the location of the grid connection. 5. Use a larger gauge wire for the AC output. 6. Refer to the AC Wiring Application Note |
| 85, 86, 88, | 8×34, 8×35, 8×37 |
DC Voltage Too High (surge) |
The SolarEdge system normally eliminates DC overvoltage errors. If the fault persists: 1. Turn OFF the inverter ON/OFF switch. If after five minutes, the LCD panel does not show a low safety voltage (1V per optimizer), check which string is malfunctioning and recheck its connections to the inverter. 2. Proceed according to Power Optimizer Troubleshooting 3. Re-commission all inverters in the site, as described in Commissioning the Installation. |
| 95, 106, 125,126, 161, 162, 166, 172- 175 |
8x3E, 8×49, 8x5C, 8x5D, 8×75-79, 8x7A- 7F, 8×80-83 |
Hardware Error | Contact SolarEdge Support. |
| 104, 163- 165 |
8×47, 8×77-79 | Temperature Too High |
Over temperature 1. Verify proper inverter clearances. 2. Make sure the heat-sink fins are clean and unobstructed. |
| 120 | 8×57 | Faulty Temp. Sensor |
Broken or unconnected temperature sensor. Contact SolarEdge Support. |
| 121 | 8×58 | Isolation Fault | PV solar array is not properly isolated from ground earth. 1. Check the PV installation for isolation problems and ground leakage. 2. Only a certified PV installer must fix the faulty string before connecting it to the inverter. 3. Refer to www.solaredge.com/files/pdfs/application_note_isolation_fault_ troubleshooting.pdf |
| 122 | 8×59 | Faulty AC Relay | Contact SolarEdge support. |
| 124 | 8x5B | RCD Sensor Error | |
| 64/65/66 | 8x1F/ 8×20/ 8×21 |
AC Voltage Too High (Line 1/2/3) |
Grid voltage is above the country limit. 1. Verify that the inverter is set to the correct country. 2. Turn OFF the inverters in the site and verify AC grid voltage. 3. If the inverter is located far from the connection point to the grid, use a larger gauge AC wire. 4. Consult the grid operator. 5. If permitted by local authorities, change the grid protection values. |
| 61/62/63, 67/68/69 |
8x1C/ 8x1D/ 8x1E 8×22/8×23/8×24 |
AC Voltage Too Low |
1. Verify that the inverter is set to the correct country. 2. Consult the grid operator. 3. If permitted by local authorities, change the grid protection values. |
| 79/80/81 | 8x2E/8x2F/8×30 | AC Freq Too High (Line 1/2/3) |
|
| 82/83/84 | 8×31/8×32/8×33 | AC Freq Too Low (Line 1/2/3) |
|
| 72/74/75 | 8×27/8×29/8x2A | DC Injection (Line 1/2/3) |
Contact SolarEdge support. |
| 44 | 3xB | No Country Selected |
Select the country |
| 46 | 3xA | Phase Unbalance | Select Power Control – Phase Balance – Disable |
| 70 | 8×25 | VLL Max | Voltage too high 1. Verify that the inverter is set to the correct country. 2. Consult the grid operator. 3. If permitted by local authorities, change the grid protection values. |
| 71 | 8×26 | VLL Min | 1. Verify that the inverter is set to the correct country. 2. Consult the grid operator. 3. If permitted by local authorities, change the grid protection values. |
| 78 | 8x2D | Grid Sync Error | Check grid voltage and frequency stability. |
| 91/92/93, 96/97/98 |
8x3A/8x3B/ 8x3C 8x3F/ 8×40/ 8×41 |
AC Over Current Line 1/2/3 |
Contact SolarEdge support |
| 49 | 8×10 | Communication Error |
Contact SolarEdge support. |
| 99-101 | 8×42, 8×43, 8×44 |
AC Voltage Too High Line 1/2/3 |
1. Verify that the inverter is set to the correct country. 2. Consult the grid operator. 3. If permitted by local authorities, change the grid protection values. |
| 105 | 8×48 | Temperature Too Low |
Make sure the inverter is installed in a location with ambient temperatures within the range specified in the datasheet. |
| 114 | 8×51 | RCD Current Surge | 1. Refer to www.solaredge.com/files/pdfs/application_note_isolation_fault_ troubleshooting.pdf 2. Contact SolarEdge support. |
| 115 | 8×52 | Unbalanced DC Voltage |
Contact SolarEdge support. |
| 116 | 8×53 | Common Voltage Too High |
Contact SolarEdge support. |
| 123 | 8x5A | Measurement Error | Contact SolarEdge support. |
| 124 | 8x5B | Ground Current – RCD |
Contact SolarEdge support. |
| 87 | 8×36 | Islanding – Active | AC grid voltage malfunction. When AC voltage returns the inverter should restart after the reconnection time. If the problem persists, consult with the grid operator. |
| 89 | 8×38 | Islanding – Passive | AC grid voltage malfunction. When AC voltage returns the inverter should restart after the reconnection time. If the problem persists, consult with the grid operator. |
| 102 | 8×45 | UDC Max | Contact SolarEdge support. |
| 103 | 8×46 | UDC Min | Contact SolarEdge support. |
| 147, 150, 151 |
3×11, 2×96, 2×97 |
Arc Fault Detected | Refer to http://www.solaredge.com/sites/default/files/arc_fault_ detection_application_note.pdf |
| 152 | Arc detector selftest failed |
||
| 1-4, 6-7 | 8×66 – 8×69 8x6A – 8x6F |
Fan # Failure | Clean or replace the fan |
| 5 | Turn Switch Off to Configure | Appears when trying to access the Setup menus during production |
|
To find out more about solar power systems with SolarEdge products checkout the SolarEdge website or click below.


Got A Question About Solar Power? Click Here For Answers!
- Can you add more solar panels to your solar power system?
- How much power can you expect from your solar power system?
- Do you know how to read your Energex solar power meter?
- Could you be saving hundreds of $$ on your pool power costs?
- How to make the most of the 44c feed in tariff
- How to make the most out of a low feed in tariff